Thursday 29 December 2011

Holiday musings

Yeouch! Dislike Mastitis in a big way : ( 
We are on a little holiday in Nelson Bay and here I am stuck in bed with lumpy boobs, feeling like a bus has run over me repeatedly. So I thought I would do a little blogging while the man and my girl are off snorkeling and my little man is sleeping.
What a year eh? Motherhood, second time around and 11 years after the first has been a fantastic ride. Little memories come seeping back as I watch my beautiful boy snooze. Certainly the lack of sleep is still numbing and breastfeeding, hmmph, still love/hate at times but all together its much nicer than the first time. That horrible panic combined with guilt is all but gone. Not quite at the juggling knives stage (maybe that's baby 3-4) but I feel like I have relaxed into motherhood this time.
I wonder what the next year will bring? A time of new (scary) beginnings for my 12 year old Lulu. She's starting High School and will most certainly come down from childhood with an unpleasant bump. I pray that she will hold onto all the life lessons I have tried to instill in her and just remain true to herself. She is a truly remarkable, unique, wonder of a girl. My little Logan will be starting to walk, run and climb and talk. His character is beginning to show too. Hmmm I'm not quite ready for that either. If only they could just remain babies, but maybe just sleep a bit more.
And me? what to do with myself...Work? Work from Home? Ahh that I shall think about another day!
For now I'm going to pop a few nurofen and have a nap.

Here's hoping the holidays are treating you well!

X Mumma K x 

Tuesday 27 December 2011

'Tis the season to be grateful...

Ahhh....It's all over and it's finally time to exhale and bask in the holiday cheer.
We had a lovely, albeit hectic, Christmas time dashing from Christmas parties to family lunches. 


As you can see, Logan enjoyed his first Xmas. He spent the morning rolling about in the wrapping paper but was well and truly sick of his Mumma snapping pictures. Lulu didn't know where to start. She's hit the technological age of 12 and got Sims Medieval and a family Wii (great second hand bargain buy...woohoo!) Hubbs got the new Skyrim game and is now thoroughly entrenched literally in another world and me....new camera (finally one that works!) and latest season of Californication.


Too many days spent on the road, at someones house and the CONSTANT packing and unpacking of the car! So today we spent the whole day just hanging out, enjoying our new shiny toys and eating leftovers with fresh bread rolls YUM : ) 


I did some baking today to use up some spotty bananas and thought I would share my yummo recipe. It freezes and defrosts well so its great for this time of year for when friends drop by and you are unprepared.


Banana Bread
You need: 

·          Melted Butter to grease
     265g (1 3/4 cups) self-raising flour
·         40g (1/4 cup) plain flour
·         1 tsp ground cinnamon
·         140g (2/3 cup, firmly packed) brown sugar
·         125ml (1/2 cup) milk
·         2 eggs, lightly whisked
·         50g butter, melted, cooled
·         2 overripe medium bananas, mashed
·         Chocolate chips if you like

Method
1.    Preheat oven to 180°C. Brush a loaf pan with melted butter to lightly grease. Line the base and 2 opposite sides with non-stick baking paper, allowing it to overhang.
2.    Sift the combined flours and cinnamon into a large bowl. Stir in the sugar and make a well in the centre. Place the milk, eggs, melted butter and banana in a medium bowl, and stir until well combined. Add the banana mixture to the flour mixture and stir until just combined. Spoon the mixture into the prepared pan and smooth the surface.
3.    Bake in preheated oven for 45-50 minutes or until a skewer inserted into the centre comes out clean. Remove from oven and set aside in the pan for 5 minutes. Turn onto a wire rack to cool completely. Cut into slices to serve.

I cook it then cut it up and freeze it in plastic lunch bags. To reheat, I spread with a little butter and pan fry for a minute each side or you can be good and just defrost it and eat.


My other quick fix for when friends drop in is scones. Super quick and easy to make and I usually have the ingredients in the cupboard. This recipe makes 6 big scones so double the recipe if you have more guests.
Here it is....


Scones
You need:
3 cups Self Raising flour
1 tbs Caster Sugar
80grams butter
1 cup milk


Combine using a knife to mix-No hands or they will get tough!!!
Gently shape into circles and nestle 6 together so they almost touch
Bake at 220 for 10-12 mins
Cool slightly on a rack then wrap in tea towel and serve warm with jam and whipped cream.
Delish : ) 


Hope you get some time to spend with those you love. Hug 'em extra tight and be grateful for how blessed we are...


x Mumma K x 

Wednesday 21 December 2011

Watermelon and Sunshine

Woo Hoo! Finally a little sunshine today : ) I caught up on the washing while Logan napped and soaked up some rays today. Its amazing how much the weather can affect our moods. 
Ahh the Christmas spirit might even be starting to build up, even though the Christmas beetles have taken a hike. (Anyone else notice this???)


This afternoon I finally found a little time to play with my sewing machine before it gets packed back away with all the mess it creates. Note to self...next house I need a Woman cave ahhh how nice would that be! Every now and then I blog-stalk Naughty Shorts and drool over her sewing/craft haven. BTW if you haven't checked out Naughty shorts yet here is the link...
http://naughtyshorts.blogspot.com/

GORGEOUS! One day when I learn patience and actual sewing skills I will make pretty dresses like these.


Anywho, enough with the rambling. This is what I made for my Lulu today:


I used the doilies I found at the Salvo's and some buttons and rifraf from the craft box. I just used a zig zag stitch over the lace in a star shape and then embellished with buttons. Simple, but pretty cool if I do say so myself. I took the inspiration from all these beautiful baby girl singlets I see everywhere. Girls clothes are much more fun than boys!

To compensate for all the excessive chocolate blogging (and eating!) of late I thought I would share a few healthy ideas for Christmas Day....

Fetta and Beetroot Salad

You need:
Fetta Cheese
Baby Beets
Spinach and Rocket mix
Slivered Almonds
Balsamic Vinegar
Honey
Salt and Pepper

Method:
Mix a half a cup of Balsamic Vinegar with a large tablespoon of honey 
Put Spinach and Rocket in a bowl 
Add drained Baby Beets and crumble over Fetta cheese
Toast some slivered almonds til a little golden
Season with Salt and Pepper, Pour over dressing 
and sprinkle with almonds before serving


You can also do the same thing with Roasted Sweet Potato instead of Beetroot and toasted Pine Nuts instead of almonds. Yum : ) 


I stole this next idea from a friends Facebook page and made it for a Christmas party. It was a big hit with the adults and kids. Have a look at his beautiful and healthy dessert....


This is easy peasy! Get a nice pineapple, seasonal fruit, skewers and marshmallows. Make skewers with chopped fruit and marshmallows. Stick the skewers into the pineapple and decorate platter with left over bits. Everyone can grab a skewer and it looks awesome. Reminds me of the old watermelon basket you used to see at BBQ's, also a cracker of an idea....


Mmmm see the sunshine is making me feel happy and watermelony. It is Christmas after all!!!!!

Bring on more sunshine x 

x Mumma K x 

Monday 19 December 2011

Santa Claus is coming to town!

I have to admit I’m not feeling much in the Christmas spirit this year. Its rainy, cold and horrible. I wish last year was like this, as I was heavily pregnant and hotter (and grumpier) than hell.
Christmas time for me means eating watermelon and salad and ham off the bone. I'm cooking curried sausages and rice for dinner tonight : (
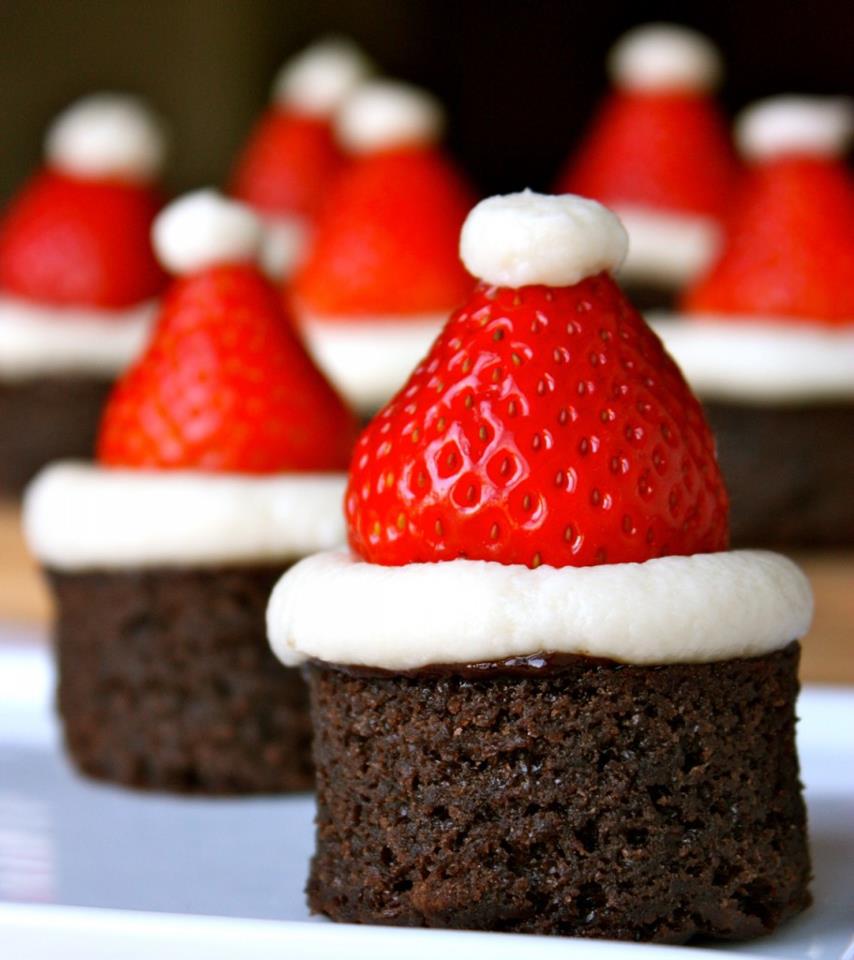
Here are some yummy recipes that are great fun and easy to make with or for the kids. Also great for gifts or for taking along to Christmas parties.

Mars Bar Crackles

200g Mars Bars (4 I think)
2 tbs cream
2 tsp cocoa powder
3 cups Rice Bubbles
Smarties and pretzels to decorate

Method:
Place Mars Bars, cream and cocoa in a saucepan over simmering water until melted
In a separate bowl mix Rice Bubbles and melted chocolate mixture together
Place into patty cases and decorate like reindeer

Cake pops

I haven't tried this recipe out but they look yummy! One day I will have time, sigh....

·         125g butter, softened
·         3/4 cup (155g, firmly packed) brown sugar
·         2 eggs
·         1 cup (150g) self-raising flour
·         1/4 cup (30g) cocoa powder, sifted
·         100g cream cheese, softened
·         1 cup (150g) icing sugar mixture
·         375g pkt milk chocolate melts
·         2 teaspoons vegetable oil
·         100g white chocolate melts
·         Silver cachous, to decorate

Method
1.    Preheat oven to 180°C. Grease and line the base of a round 20cm cake pan. Use an electric mixer to beat the butter and sugar in a bowl until pale and creamy. Add the eggs, 1 at a time, beating well after each addition. Add the flour and cocoa powder and stir until just combined. Spoon into prepared pan and smooth the surface. Bake for 35-40 minutes
2.    or until a skewer inserted in the centre comes out clean. Transfer to a wire rack to cool completely.
3.    Break up cake. Process in a food processor until mixture resembles fine crumbs. Transfer to a bowl.
4.    Process the cream cheese and icing sugar in a food processor until smooth and combined. Add
5.    to the cake crumbs and stir until well combined.
6.    Line an oven tray with baking paper. Roll tablespoonfuls of cake mixture into balls and place on the prepared tray. Cover with plastic wrap and place in the fridge for 4 hours or until firm.
7.    Place the milk chocolate melts in a heatproof bowl over a saucepan half-filled with simmering water. Stir with a metal spoon until chocolate melts. Add the vegetable oil and stir to combine.
8.    Dip the end of 1 lollypop stick in chocolate then insert into a ball. Return to the tray. Repeat with remaining balls. Set aside for 5 minutes or until set.
9.    Dip 1 cake ball into the melted chocolate, turning to coat. Gently tap on the side of the bowl to remove excess chocolate. Insert the cake pop in the polystyrene to stand upright. Repeat with remaining balls and chocolate. Set aside for 30 minutes to set.
10.  Place white chocolate melts in a heatproof bowl over a saucepan half-filled with simmering water. Stir until chocolate melts and is smooth. Set side
11.  for 5 minutes to cool slightly. Spoon a little of the melted chocolate onto the top of each cake pop, allowing it to run down the sides slightly. Sprinkle with silver cachous to decorate. Return to polystyrene to set completely.
Notes
·         *You’ll need 1 packet of lollypop sticks and a block of polystyrene for this recipe.


These next two recipes I have "borrowed" from my favorite blog, Stay at Home Mum. I have included the links. 

Easy Basic Biscuits

Love this biscuit recipe. I always add the custard powder or they do end up quite floury. Click on the link for  suggested biscuit flavours but its only limited by your imagination and contents of your cupboard. This makes so much batter, i just freeze the leftovers in cling wrap sausages for quick afternoon tea or when friends drop in.


500g butter or margarine
 1 tin condensed milk
 1 cup sugar
 5 cups self-raising flour

Method:

Cream sugar and butter. Add condensed milk and flour. Roll into teaspoon sized balls and press down with a fork. Place on greased trays and bake in moderate oven until golden brown (approximately 10-15 minutes).  For a less ‘floury’ biscuit – substitute half a cup of flour for 1/2 cup of custard powder.


Chocolate cake in a mug

This is quite possibly the coolest recipe in the whole world. Lulu and I tried this last night and it works like a treat. So yummy and rich!!! Great with ice cream.

 4 tablespoon self raising flour
 4 tablespoon sugar
 2 tablespoons cocoa
 1 egg
 3 tablespoons milk
 3 tablespoons canola oil
 3 tablespoon chocolate chips

In a large coffee cup add all the dry ingredients (including chocolate chips) and stir well. In another cup or bowl, add the egg and milk mix alternatively with the oil and again mix   thoroughly. Pour in the milk and oil to dry ingredients and mix well.
Put your mug in the microwave and cook for three minutes. The cake will rise over the top of the mug, but don’t be alarmed! Allow to cool a little, and tip onto a plate if desired.  Needs chocolate sauce or ice cream or cream – but delish!


Happy Baking!

x Mumma K x 

Sunday 18 December 2011

Jingle Balls


Owls oh how I love Owls!!!! I have wanted one of those cool toy owl that are all the rage at the markets these days, but for $30 a pop...not gonna happen! Thats why I was SO flippin' happy when I saw these panels when I picked up the Xmas toy ones at Spotlight.


I can make not one but SIX owls for $6.50 (its classified Xmas material so half price?) OMG!!!


The big one is mine and his name is Buttons!
I'm so happy with these sewing panel things. They are good for me because I'm a terrible sewer and with Logan commando-ing all over the place, I have very little windows of time to spend at my craft table.

Lulu and I have also been busy crafters making super cool Xmas balls. I remember making these in Primary school a zillion years ago and it was so sweet making them with my girl.


Here’s what you need...


*Styrofoam balls
*Nail file
*Scraps of material (I bought 1/2 a metre in two fabrics which          was tons)
*Sequins & Lace to decorate
*Ribbon 
*Pins

Method:
Use the nail file to poke the material into the Styrofoam ball. Just aim for the edge of the material and poke away. I prefer the messy, haphazard method but you can do quarters if you prefer.
Use the lace to cover up the seams by poking in the same way.
Use a ribbon to tie a loop to hang on the tree and pin some sequins on to make it sparkle.
And tra la! The finished product..


 Easy peasy and they have all different size balls at Spotlight.

I also wanted to show off my other Xmas tree decorations from the lovely folk at Big W photos online. I just did some updated ones so Logan had some too : ) They make great presents for Grandma's or friends with new bubs too.


You simply upload photo and they turn them into awesome porcelain stars, hearts or snowflakes. It takes about 10 days and you pick them up at your local Big W store. Keep an eye on the website because they quite often have half price sales on. Here's the link to check 'em out..

Hope you are enjoying the blog! Don't forget to pass the link on to your friends. It's been a bit craft focused of late so I will do some more yummy recipes next blog.

Take care and be good coz Santa's watching!

x Mumma K x 


Saturday 17 December 2011

It's Beginning to Look a lot Like CHRISTMAS!

Good afternoon all. As we are very nearly approaching Christmas Mumma K kindly asked if I could make an appearance and share a treat (or two)... So here goes...
I personally love buttons, love them, infact if I could spend eternity bathing in buttons it wouldn't be long enough. In my love for buttons I have experimented with many different ideas, but am in love with my button ball-bell.


Here is what you need: 

  •  buttons (of your choice and size)
  • sequins (colour coordinating with buttons)
  • hot glue gun
  • polystyrene ball (spotlight, crafters shops)
  • ribbon (Christmas colour)


First and foremost it's important to choose buttons and ribbons you love and that co-ordinate... Once you have found what you want cut about a 10cm ribbon length for the 'hanger'. Glue that on first and then start building the buttons around that, working down.


I have used white buttons of different sizes and filled the gaps with sequins. I have also used glitter glue to fill the gaps in other ball-bells I have made. They are easy and therapeutic (just be careful not to burn yourself with the glue gun!), look absolutely stunning on your tree and you can show them off to ALL your Christmas guests, or better yet give them away as embellishments on gifts... oh the possibilities are endless!!!!  


And here's an example of another button ball-bell using a variety of coloured buttons, glitter glue and a matching ribbon, love much?


Happy crafting all, and only 7 more sleeps till the big fat man delivers pressies (or coal!). 


O Christmas Tree....

I am a massive bargain hunter (or tight arse whatever you prefer) and love to Opshop. 
Lately, I have quite obsessed with the Online version, which is awesome. I have picked up some absolute bargains...a big TV for $16 and tons for the kiddles. I love giving my money to other families rather than making the big boys rich. But with Christmas looming and times tougher than ever, its as mental online as it is in the stores. Geez people can be vicious when it comes to getting a bargain!
So I thought I would do it the "old fashioned" way and head out to the Salvo's at Toukley, my personal fave. The ladies there are lovely and there is the best craft section. The only beef I have is I can't get up the stairs to the books and kids toys. 
Tough luck kids : ) 
I got a big stack of craft magazines, buttons (ahh I LOVE buttons) and a stack of beautiful crocheted doillies for $4.50!
Think I might try to make some cute tops uing the doilies...

I love Opshopping so much! I love going out and never knowing what gems I will come home with. I love that the money goes to charity. And I love a bargain!

I also paid Spotlight a visit this morning to gather supplies for some school holiday/Xmas craft time with my big girl. There is 50%off Xmas material and most Xmas things at the moment which was great for the poor budget!
I got these...

And made these...

So easy! Lulu actually made the first two. You just cut out and sew together. Fill with stuffing and hand sew up the gap. At half price it worked out $6.50 for a panel which makes 20 small toys or add some ribbon and make it a tree decoration. We also added a bell inside which we put in a kinder surprise container and sticky taped together (so the bell doesn't escape..choking hazard for bubs). Bargain! And Lulu is learning to use the sewing machine!

Well I best run and get dinner on so I can get back to my crafting. So inspired lately must be all this blogging and researching!!

x Mumma K x 

Thursday 15 December 2011

Madness..utter madness!

Madness...utter madness! This time of year people literally lose their minds. You see them in the shops all wild eyed, driving like maniacs, cutting in line, wildly grabbing discounted items and foot tapping at the checkouts. 
Thank goodness I can say, I AM DONE! Presents are wrapped and under the tree and if I have to go to the shops for anything at all, I'm going after hours.
It's around this time that the Mumma Guilt kicks in (mixed with the Xmas hysteria of course!). I start to look at the presents and wonder, is it enough? It doesn't look like much? Hmmm, maybe I should just get a few more small things to put under the tree..... Then $100 later you have bought way too much and its over priced crap that will be thrown out in the next clean  up anyway. Ugh. No it's ENOUGH! 


This morning Lulu and I made some cute little Xmas reindeer to give out to her classmates. Its her last day of primary school today and I am feeling a little teary. So many new experiences, hormones (oh god!) and more loosening of the ties. I feel just like I did when she was starting Kindergarten. But at least I have six weeks of holidays to enjoy her before the big transition to High School.


Here's our reindeers

They are really simple. Just need :
Candy Canes
Pipe Cleaner
Eyes 
Pom Poms 
Hot glue gun or glue


Twist the pipe cleaner ears on and stick the eyes and nose on with glue. I used the hot glue gun which was really quick and stuck on well.


I also saw these and thought they were a bit awesome...

I'm thinking tiny cupcake moulds with chocolate fudge cake and some butter cream icing for the white bits or even white chocolate ganashe YUM!!!! Quick, cheap and easy, loves it! 

I hope everyone is getting on track for Xmas. Gotta get the house cleaned up before Hurricane Lulu gets home from school and Logan the Grumpy Pants Man wakes up from his morning sleep

or I could just sit and have a coffee in peace

Decisions decisions!!!!

X Mumma K X 

Tuesday 13 December 2011

Last week of primary school for my big baby Lulu :(
The school she is at has been a absolute God send the last 2 years since we moved. She has had so many opportunities to shine and I couldn't be a prouder Mumma!

So, although I have left my run a little late for crafty, homemade teacher gifts, I thought I would share some ideas I have nicked from other blogs.
I'm sure they won’t mind though : )


How cool does this look?


Love the flowers

Love the wreath idea. Imagine this on the class room wall.
You can get wreath frames from craft stores like Riot or Spotlight

Great message or you could use the schools motto

Love this idea! It would be cheap & easy to make 


Don't forget your day care teachers too!

So with the school year coming to an end, Its time now to prepare yourself for the onslaught of Xmas school holidays...ARGH! I can hear "But I'm borrreeddd!" echoing in my ears already.
SO here's a link to check out some ways to pamper yourself in the next 2 days before Xmas and holidays hit!


One for the dreamers...


Be well
x Mumma K x 

Monday 12 December 2011

Just hand over the chocolate and nobody gets hurt...

Yesterday I decided to test out some recipes for Christmas...(yup I scoffed chocolate all day)

I'm always seeing these cool recipes and when I try them, they don't work out all pretty like the picture. 
So I shall attempt to "keep it real" here and road test as much as the shoestring budget will allow.

Here's what I got for you....


Little Chocolate Puddings

You will need: 
Chocolate Royal Biscuits
(I used Woolies Brand Rocky Road and they were delish!)
Half a block of White Chocolate
Jaffas
Spearmint leaves

Method:
Melt white chocolate, drizzle over biscuits. 

Decorate with Jaffas and Spearmint leaves.
Allow to set in the fridge

YUM!

These were soo easy and looked fantastic! Best ever : ) 


Teddy Sleigh 


You will need:
Candy Canes
Melted chocolate
Mini Milky Ways
Tiny Teddy Biscuits

Method:
Use the melted chocolate to glue the Candy Canes to the bottom of the Milky Ways
Allow to set. 
Turn over and gently squish the tiny teddy in the top.

These were really fiddly. I tried undoing the Candy Canes from the plastic but they kept slipping so I ended up leaving them wrapped and turned them over and stuck them that way. I used a little melted chocolate to "stick" the Tiny Teds on but on reflection, it kinda looked like poor Ted had pooed himself! 
Maybe use room temperature Milky ways and make a small incision in the top to put the teddy in.

Anyway it all tasted and looked great so I'm happy : ) 
Lulu's teachers are getting a plate of each wrapped in celophane as their Xmas pressie so I hope they like 'em too!
Gotta run now, I'm off to "road test" Max Brenner at Tuggerah
...mmmmmmmmmm

x Mumma K x