Wednesday 19 December 2012

The great dough debate

Limping my way through the silly season this year! After my looooonnng stint on work placement for my course, I have gone into hibernation mode. For the first time in a long time, I find myself laying on the lounge- doing nothing! Miraculous as I can usually NEVER sit still! My family always jokes that I never remember the plot to any movie because while I'm watching the movie, I'm knitting, painting, beading, on facebook, reading a book and cooking cupcakes at the same time. I'm taking this relaxation time to reflect on the year and just let my poor fried brain and body rest up.
That being said, I have been road testing making ornaments to decorate and give as gift tags. According to Pinterest there is two main doughs to use- salt dough and cornflour dough. I tried both and I think I found my champion....The Cornflour Dough!
 Here's a snap of both....
Cornflour dough VS Salt Dough

Here's the recipes;


CORNFLOUR DOUGH


1/2 cup cornflour
1 cup baking soda
 3/4 cup water

Add the ingredients to a saucepan. Stir over medium heat until it thickens to consistency best described as sloppy mashed potatoes (hehe).  Allow to cool on the bench (if you fridge it it gets sloppy) . Knead until smooth adding more conflour if sticky. Roll out and make into shapes then bake 80 degrees for about 1 hour, flipping over halfway through baking. Use baking paper to avoid sticking!

The Pro's and Cons
This is trickier than it sounds. I found it really hard to get a good consistency and was tricky to make into shapes. I used plastic cookie cutters though so maybe give the metal ones a go. And roll out on baking paper so you don't have to transfer!
Another con is that if you roll out too thin or the dough is too dry you may get cracking. It also has a bit of a funky smell and I wouldn't give it to young babies to play with.
The pro's... it looks gorgeous! Pretty and white and smooth surface kinda like ceramic. You can use stamps to print shapes or patterns on and it holds it shape. Looks great painted and varnished. Tip. use PVA glue to seal. it works just as well and its cheap as chips!

SALT DOUGH

1 1/2 cups plain flour
1/2 cup fine table salt
1 tablespoon vegetable oil
2/3 cup chilled water

Add all ingredients and knead. Much like playdough. Just roll and go!

The Pro's and Cons
This is easy peasy! Just like making a stiffer playdough. It is super easy to work with and is good for hand and foot prints.
The cons.... it has a yellowy appearance and never dries completely hard.  After I painted and varnished with PVA glue, it went a little softer like it absorbed it. I'm not sure how long this dough would last where the cornflour dough would last for many years.
Also when I tried to use my stamps, it dried puffy so the image was blurry.


So in conclusion, while the cornflour dough took some experimentation and a few batches to perfect, I really liked the end result!

Give it a go, I would love to see your creations...

And Merry Christmas 

Friday 5 October 2012

Frosty marbles


Gosh the end of school holidays already? Man that went by 
in a blink! My Lulu has been enjoying sleepovers this week so I have had a grumpy/sleepy pre teen as well as a grumpy/clingy toddler who is adjusting to daycare. 
And me? Insomnia has become my worst enemy. I will never ever take for granted a restful night sleep again! My poor Hubbie is ready to club me too, because if I can't sleep- neither does he. 
But on a positive note, Valerian is starting to work for me. Hopefully  my sleep patterns will be back to normal soon.

We have had a fun week here and I have got to road test a few fun ideas I got from Pinterest. Here is a run down of the week.....


Frozen Water Marbles


These were awesome! I found this link on Pinterest a while ago but personally not a fan of using food colouring with my Bubba as its a nightmare to get off hands and clothes. 


http://queenvanna.wordpress.com/2012/02/01/ice-ballons/


So, I just filled balloons with water then sat them in a coffee cup in the freezer. Poor Hubbie was very perplexed haha! 
Then once frozen, you just cut away the balloon.
I put mine on a tray and added warm water so they melted a bit and became bumpy and textured. Bubba was fascinated trying to pick them up, lick them, pour water over them, move them and explore the coldness.

Although I left them plain this time, you could pop in glitter, sequins, paint or toys in to mix it up a bit. I saw these pics too but you would need to make sure it was age appropriate and heavily supervise. I'm not too sure I would let a 4 year old wield a chisel, but each to their own!


http://alittlelearningfortwo.blogspot.com/2011/09/ice-eggs.html

http://give-in-to-me1.blogspot.com/


Plain Playdough with Popsicle Sticks


I think children need a time out from colour overload every now and then. Not everything needs to be "Fisher Price red, yellow and blue" to be fun. Give the natural look a go or clay colours for a change. Bubbba really liked the pop sticks too, although he did put them on his mouth and have pretty blue lips.
Playdough is great on its own, don't overload kids too much with stuff like playdough cutters as you are changing the focus from sensory manipulation to a controlled play. Allow them to use their imagination and give "open ended" props that can be used to make anything their minds create. 
Natural and found materials work well too like gumnuts, leaves, twigs, dirt, sand etc. Go for a treasure hunt with a basket and create something special with your finds.


Textured Finger paint


I love messy play (duh!)Sure it does take a bit more effort but the results are priceless. To be prepared, I run a bath, get  towel and change of clothes ready, prepare a bucket of water outside (left up high so out of reach of kiddies), get the camera ready and change into daggy backyard clothes myself. All this preparation means I can just enjoy the experience and not need to stress.

I set this up by sticky taping some bubble wrap that I recycled from the mail and using some aluminium foil too. Obviously if you are going to use aluminum foil- don't do it in full sunlight!! 
I prepared some paint in little containers and had more paint to refill on hand too. Bubba is very into paintbrushes at the moment, so I had a range of different brushes ready for him to use. For small Bubs, the bigger and thicker the brush the easier and as they get more confident add smaller, thinner. Great for fine motor skills!

This paint experience is sensory overload! Smooth and shiny Vs Bumpy and squashy. So much fun!
As you can see, I also took a print of the bubble wrap (paper over the top of the bubble wrap). I'm planning on framing the result. Very Eric Carle (illustrator of the Very Hungry Caterpillar). Awesome 
Things to make with T-shirts


In our family, we do handmade gifts. So much these days is money driven and technology based. Any opportunity I have, I shift the focus back to family values of gratitude, the joy of giving and creating with love. 

The Hungry Caterpillar cushion was made using a block from Spotlight for Bubba for his fist birthday. The middle was made by my Big Girl for her bedroom, using a T-shirt from Kmart. (Queen is the Beiber in my girl's life- Great taste in music is also one of our family values haha). The last one, I made for Lulu using a shirt from Target.
You can't get much simpler sewing than this. You just sew the top and bottom and stuff with polyfill or old cushions. Pretty cool eh?

If you would like any further inspiration of T-shirt craft , check out my Pinterest page, https://pinterest.com/krisnlulu/things-to-make-with-t-shirts/


Time for this Mumma to get off the computer and suck up the last of the holiday fun before the grind begins again x x x 

Thursday 27 September 2012

Play like a Boss


What a week! As you can see I decided to plan a few activities for my big girl too and she loved it. I will definitely devote more time and energy into including big kids into the blog.

So here’s a run through of our fun week...

Stacking and sorting
I found the mixing bowl and spoon set from The Reject Shop for $10! It’s awesome because it’s lovely and bright and a great, useful set for the kitchen as well as a toy.
Great for littles so they can learn to stack up high as well as stack inside. Big scientific concepts for little curious minds!
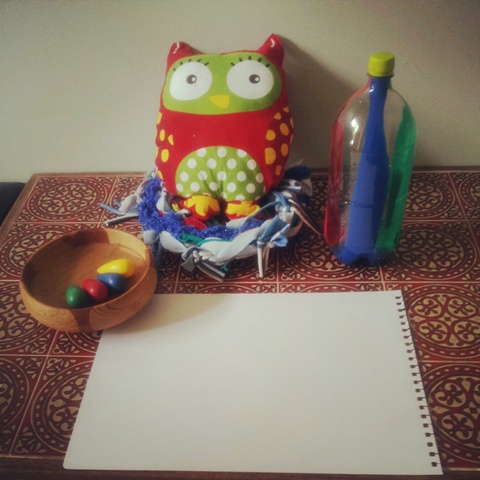
The Birda’s
I think Logan enjoyed this the best of all. He just loves birds and is so amazed when he sees them flying in the sky.
I got the pictures from a cheapo calendar of Australian animals and taped them up in his bookshelf space. He loves to look at the colours and point to them.
Check out the calendars mid year when they are heavily reduced. You can use anything your child is interested in eg cars, planes, trucks and use them for collage, decoration for bedrooms, DIY books.
The birds nests were a little craft activity that I did a while back. They are made from weaving old clothes on an embroidery circle. You can do big ones on a hula hoop, which would make great rugs. Here’s the link, so you can see what I mean... http://carazara.wordpress.com/2011/08/22/hula-hoop-rug-craft/


Scrapbooking for the Big Kids
My Lulu told me she would like to start a scrapbook of her first year in high school. I thought this would make a lovely keepsake for her and always encourage her creativity. We bought a $16 (bargain!) Scrapbook Starter Kit from Kmart and I bought some extras like scissors, glue and extra stickers. Photo’s were $2.80 to print and away she went! The results were fantastic. She wrote little comments about little insider jokes between her and her friends and even made a “I love my family” page. I just love my beautiful girl and I hope she always remains true to herself.


Playdough and Farm animals
I love making playdough. It is so therapeutic especially on the challenging days, to smoosh this stuff through the fingers and Logan feels the same way. Nothing breaks a grumpy day like playdough can. I rolled some balls for him to squash as his little hands can have trouble manipulating a large chunk and added the animals for him to bury, make tracks with and just explore on their own.
To make your own playdough its super, super easy...
1 cup plain flour
½ cup salt
2 Tsp oil
Water and food colouring to mix
Add water a little at a time and knead away until its good. Add more flour if its sticky, add more oil to make it smoother. You can also add food essence to make it smell nice. I like adding vanilla essence.


Pizza dough and Shortbread
We did some cooking this week which is a great family activity. It teaches respect, gratitude, sharing, and of course, the end result is yummy!
We often make homemade calzone (think pizza in a bun) and it is amazing!
Here is my recipe...
2 1/2 to 3 cups flour (can use a combination of white and whole wheat if you prefer)
1 tablespoon sugar
1 teaspoon salt
1 package (2 1/4 teaspoons) yeast
3 tablespoons olive or vegetable oil
1 cup very warm water


Combine yeast, sugar, 1 cup of the flour, and salt in a large bowl.
Add the warm water and oil and mix.
Stir in remaining flour slowly until dough is soft but not sticky.
 Knead until smooth.
Let the dough rest for at least 30 minutes before making the calzone. I like to put mine in bowl with cling wrap underneath so it does’nt stick and cover with a tea towel. It needs to be in a warmish area for the yeast to rise so I usually put the elements on the stove  next to it on for a bit just to warm up the area.
After it has rested, knead again. Then pop it on an oiled oven tray and spread out. Fill with your usual pizza filling to what ever you like (Hubby like olives, anchovy, jalapeño chilli, and spicy salami while I like vegetarian and cheese- We usually make two then have the leftovers for lunch the next day!)
Then “wrap the baby”! Fold the sides in and bake 220 degrees for 15-20mins til golden brown
Mmmmmmmmmmmm so good!
Heres a link for how to make it look a bit fancier... http://mysanfranciscokitchen.com/braided-ham-and-cheese-calzone/

Owls n Eggs
Egg cartons and cupcake tins make excellent holes to place items in. Use patty cases, pom poms, cotton balls, material scraps, felt, blocks..whatever you have available! Logan brought his tea pot over and used it to stash pom poms in too.
For older children, a exploration box can be added with coloured rice, pebbles or pasta with a scoop to practise pouring too.
                                 
Block Sculpture
Blocks don’t always have to be built upwards! Use them to make mosaic patterns on a placemat or piece of material and encourage children to be their own artist! Use different shapes and some nice sensory material to display their work. The best part is that you get to have a play to set it up too. Confession- I think I enjoyed this more that Logan did hahaha!
You can also combine blocks with other materials for fun. Include scarves, tissue boxes, bark or leaves, toy cars, small figurines, blue prints or plans from builders, inspiration pictures such as posters of houses and buildings...the opportunities are endless!


Well I'm off to put my feet up while Bubba is asleep and my Big Girl is having some Grandma time. 
Hope you find some inspiration here and enjoy the weekend!

Tuesday 25 September 2012

I'll have what she's pinning...

School Holidays have hit and I have been one busy Mumma! 
Lucky me, I was able to have one whole day with my Big Girl Lulu while Little Man was in daycare this week. We went window shopping and looked in all the stores I can't usually get into with a pram and hit a few opshops on the way. 
Today while Lulu was busy scrapbooking and Bubba was in bed, I got some time to Pinterest. 
Ahhhhh I love you Pinterest! Although, I think I would like to make a blog about Pinterest fails (assuming there isn't many already!) , like Cake Wrecks. If you haven't seen it heres the link http://www.cakewrecks.com/...hilarious!!!

So here's what I'm finding pinteresting...

Rainbow Roses
I've seen these beauties in the fancy florists for a small fortune. I think Lulu and I will give this try sometime these holidays. As far as I can gather you slice up the stem and poke them into food colouring and water and voila. Stay tuned for results but here's the link http://tothelesson.blogspot.com.au/2012/05/flower-fun.html
If you beat me to it, let me know how it turns out.


Banoffee Pie...drool

I did actually give this a crack and it is sooo rich and indulgent! I used top and fill caramel and omitted the cream though. Here's the link http://inspire-keri.blogspot.com.au/2011/06/recipe-tuesday-banoffee-danger-pie.html


Photo Blocks
Definately need a trip to Bunnings and will be road testing these bad boys. How lovely would these look displayed on the mantle or shelf or even given as a present to a toddler? LOVE it : ) Heres the link http://www.twobusyblondes.com/2012/06/photo-blocks-fun-creative-way-to.html

And finally, please check this blog out...http://awesomelyawake.com/#  . Really well written and lovely Mummy Blog.

Thanks for stopping by :D

Thursday 20 September 2012

Play pics

Ahh coffee in hand and Bubba in bed...is there anything better? Hmmmm Johnny Depp, a bucket of chocolate and waiter to serve me Mojito's while I'm lounging by the beach....hehe must not be greedy.

This week has been super fun thinking up all the "Playspiration ideas". Logan is quite possibly the most spoilt boy on earth and doesn't he know it! I usually do my set ups at night, so when he wakes up in the morning he is always looking around for his next surprise.
So if you have missed the facebook pics, here is a run down:

DIY Feltboard and Hungry Caterpillar Story


DIY your own felt board and if your'e feeling crafty have a go at felt story board pieces (If not check out Ebay there are lots out there!)
To make the feltboard, its so simple! Felt, glue in photo frame minus the glass and voila! You could also stick the felt into a manilla folder and have a travel felt board.
Felt is great fun to work with. It cuts well, no hemming and you can use a sharpie and draw on it too.
Link in to a special book like The Very Hungry Caterpillar or The Jolly Barnyard and present it on a recipe holder or easel. Simple but effective.

The Music Mat

All kids should experience banging the heck out of Mum's pots and pans! Use whatever is in your cupboards, pop them on the floor on a rug or tablecloth. Go make yourself a coffee and have the Nurofen ready.
For our selection here are some Milo tins, wooden spoons, pot lids for cymbals, pot and whisk, colander and spoon. In the basket are wooden curtain rings for tapping sticks, cardboard tubes and water bottles filled with bells and rice.

 Cubby House book nook and secret space! 


This play tent was a score from the Salvo's. I got a set of two tents and a tunnel for $10!!! Logan loves it so much and peekaboo can go on forever as he launches himself out haha!
Inside, I put some soft toys and a few books and pillows but as the day when on it was a secret stash place for all sorts of goodies from around the house ps. house keys
To bring in something unexpected, like outdoor toys inside, is a lovely surprise for the little person or people. Such a novelty and kids LOVE a secret spot.

Wooden Curtain Rings and Silver Tea pots


This was the favourite of the week! So many possibilities to explore these bits and pieces. Its still set up and Logan goes back to it everyday. 
The rings are great to stack and place on the paper towel roll holder. The door knobs are stashed everywhere! He loves to put them in the silver teapot and then shake them around. And of course the cars are brrrrrrooooommmmed all over the floor too.

These ideas's can be left in place for an hour, a day or a week or two depending on the interest and of course your space. 
My mind has been racing, can't wait for the next week of fun pictures. Hope this has inspired some creativity, please feel free to post your own Playspirations on the FB page too. We can all inspire each other :D

K

Saturday 15 September 2012

Would you like to play?

So since study is going to be HECTIC over the next few months, I've decided to change things up a bit. Instead of writing a huge blog I'm going to try to put a few pictures onto the facebook page (http://www.facebook.com/MummaKnowsBest) and then tie it into a blog when I get more time.

Invitations to play...what on earth is that?

Something beautiful, interesting, tempting, enticing, aesthetically appealing (childcare mumbo jumbo) for little hands to explore, destroy, rearrange, arrange, experiment with.

I always use what I find around the house with a healthy dose of imagination. Something ordinary may be extraordinary to new eyes.

Please just use your brain though when planning...anything smaller than would fit into an old film canister is a choking hazard, with water- please use hands on supervision, be careful with breakables on tiles. Common sense really :D

So here is my first invitation to play...Jungle Discovery Table!


I used a old bed sheet as a table cloth, palm leaves from the garden, scrap of silky fabric as water, river stones, cane placemat, picture of Logan as a baby and some plastic animal toys.
Admittedly, the animals were a little small, but I was supervising very closely! And the reaction, well see for yourself....


  Hope you find some inspiration here to create something special yourself! 

Goopy Goodness

My my where has the time gone!?! It has certainly been a very long time between posts as life, family and study have well and truly been absorbing all of my free (haha, yeah right!) time. My little sleepy man is not so much about the sleeping either these days so its very hard to grab a moments peace.

Anyways we had such a lovely afternoon today I was compelled to write...

We have been soaking up this glorious sunshine of late, after a very long winter crammed indoors. My little one is a big fan of exploring the backyard and I am also a big fan of lazing on the big orange rug watching him haha!

Today I introduced him to goop. He was so fascinated and we even managed to get the teenager out of her bedroom! Goop is cornflour mixed with water and a little paint (or food colouring, but i find it stains so I use poster paint instead). It forms both a solid and a liquid so when you grab it its hard like clay and then it runs through your fingers like water. Amazing!
I would recommend trying it out on the grass rather than the pavers though. Its hard to get off once it sets.


Big hit with both kiddies today, although Lulu did ask that next time I make the goop red so it looks more like blood. Ahhh thank you Twilight for making my darling girl thirst for blood. Gotta be thankful though, at least its not One Direction or hot pants and we draw the line at sacrificing animals in the backyard (i'm kidding really haha)

The other highlight of my boys day today was having a big magpie drop in for a visit. "Birdy, birdy!" he whispered as he watched him eat worms. Ahhh simplicity gotta love the nature and the look on his face was priceless.


Well I was thinking I might add some photos to the facebook page when I'm too busy to blog to keep the ideas flowing. I have a ton of "invitations to play", so keep your eyes peeled.

Take care and get out there and enjoy this beautiful weather x 

Saturday 23 June 2012

Stuck on you

Just a quick post in between mopping the floor and the Little man waking up from his nap....


This week I introduced Bubba to collage. I wasn't expecting great things to be honest, given he is only 13 months and a force of destruction but to my great surprise he really enjoyed it.


I stuck a piece of clear contact paper (sticky side facing you- not the door lol) onto the glass sliding door and reinforced with some sticky tape. Then I found some old pieces of wrapping paper, wool, cellophane and feathers and popped them into a basket.


He loved touching the sticky contact paper and, of course, had a lick too. Then to my great surprise began to stick things on. He sat for nearly half an hour which is remarkable for him!


I left this up for him to return back to during convenient times, like when I was cooking dinner and he also found that pulling things off the contact paper was nearly as much fun.


I recommend trying this one out especially on cold, rainy days when the cabin fever sets in.


Enjoy and happy sticking!

Tuesday 5 June 2012

Play-spiration

Today I have a few ideas for using upcycled found materials to make some toys for enquiring minds. My little man loves to "post" things at the moment. Blocks go into a box or basket then get tipped or place out then back in again. If only I could train the teenager this way!

Sorting and posting are a developmental milestone and a popular play activity for 1-2 year olds. Children are learning about volume, space, measuring, colours, sorting and matching as well as the fine motor development in manipulating the items.

Here some ideas!


Here we have a big cane basket, an egg carton and a muffin tin. In the basket, I put patty cases, lids from baby bottles and some papier mache balls. Logie loved this activity the best. He discovered the balls fit inside the lids and delighted in repeating this action for about an hour.


Tissue boxes are great for posting items like blocks, lids and here is some scarves. Bubs can put them in and take them out. Also for a great sensory activity add different sorts of materials like lace, satin, cotton etc. Don't go to any expense! I use old clothes, doilies from the op shop and old ties from the Hubbies wardrobe. You can go to a bit more effort and cover the tissue box in wrapping paper and clear contact. Makes it a bit prettier but honestly the Bubs don't mind : )  


This is a old milk jug with 2 holes cut out. I covered the edges with electrical tape so they weren't sharp and thats it. Things to post? Blocks, lego, bottle tops from baby bottles, balls, anything!!!


This is just a nappy box with a hole cut in the side. Again you could cover it but i like Pooh Bear anyway : )  The posting items are family photo's from a cheap photo album. You can cover photos or pictures from magazines with contact and it works great too. Logie like to drag this over to his ball pit and fill it up with balls, uses it as a walker and slides it across the floor, sits in it and his Dada pushes him around like a race car, puts it on his head and plays peek a boo.....you get the drift. 

The idea is to give your Bubba open ended materials. This means things that can be used in different ways. This is where the Fisher Price toys fall down. The kids play with them once or twice and then???
Give them a cardboard box and a few scraps of material and watch them create their own learning.


Also did a cute little setup to encourage Logie's creative side. He is just starting to "get" drawing and was so excited to make marks on the paper today. These crayons Faber Castell crayons are great for little hands. Make sure you use large, thick paper so they don't rip or miss the paper. The bottle next to the owl was made from a 2 Litre empty Pepsi Bottle with paint poured in. When it gets rolled around the paint spreads, fun!

Hope this helps inspire some creativity, especially in this rainy, cold weather x x x 


Sunday 3 June 2012

Comfort Food

Ahh we have officially de-caterpillared the house and back to the day to day grind. 
So happy to see the sunshine today if only fleeting. I still wasn't keen to risk the clothes line so I hung all the clothes (ok 2 weeks worth of washing-eep) out on the patio. Thank God we have clean undies again..close call!


This cold rainy weather makes me crave the winter comfort foods and i have a confession to make...I am a soup-oholic! In Winter, I could live on my Sunday Soup (with chunks of fresh bread and lashings of butter). Ok so the extras are not great for watching the waist line but this soup is so good for keep immunity up, the budget and is a very healthy, hearty soup.


Sunday Soup


This got its name because I clean out the fridge on Sunday to make way for the new groceries. I use up all the left over veges from the week and add some freshies if needed.


You Need:
One Roast Chicken- I usually buy two and roast them both at the same time. One is for a roast dinner and one for the soup. I strip all the chicken of meat and keep aside for the soup. You can use BBQ chicken but I like it better with Home Cooked.
2-3 Potatoes
1 x can corn kernels or cob of corn chopped up
Stick of  Celery- don't get ripped off buying a huge bunch of celery (unless of course you plan to use it for something else). Most supermarkets sell them buy small stick and it will cost like 15 cents.
1 x brown onion
Pumpkin, mushrooms, sweet potato, broccoli, spinach, carrot- Basically whatever you have in the vege drawer.
4 x chicken stock cubes or equivalent stock
Optional- 1 chilli- deseeded and chopped very finely ( I add a very small one and you don't really notice it in there but its great for moving the works along, if you get my drift! Great for weight loss soup also skip the bread and butter though)


How to make:
Boil water in a big pot about 1/2- 3/4 full
crumble your stock cubes into the pot
Chop all the veges up into chunks
Add veges and give a stir
Leave for about an hour
Add your chopped chicken
Stir and leave sit for a half an hour.


Voila! Soup done and ready to pop into the freezer. I freeze mine in lunch boxes so if im having a busy day, I have a meal ready. Logan loves his soup. Teenager not so much. I like to leave it rustic and chunky but if you like your soup smooth, pop it in the food processor for a minute.
For another variation, add chopped garlic, can of kidney beans and can chopped tomatoes and its Vegetable  Minestrone, add pasta - even heartier. Omit the chicken and its still great. Best news is its cheap as chips to make and great for keeping Winter sniffles at bay.
Someone else is a big soup fan!


Today we made Chinese Chicken and Corn Soup for lunch. Little man ate a huge bowl and then polished off half of mine, all the while exclaiming, mmmmm num num num! So cute.


Chinese Chicken and Corn Soup- SO flippin easy you will wonder why you don't make it more often!


You need:
1-2 can creamed corn
1 small chicken breast diced
2 x chicken stock cubes
Water in a pot
2 x egg whites
Small onion diced small
Sesame oil
Green onion if you want to be fancy


Method:
Boil you water, if you only want a small saucepan full use about 1 1/2 - 2 litres water
Crumble stock cubes in.

Add creamed corn and onion 

While the water is boiling add the chicken to boil, this should only take 5-8 minutes. If you are not sure pull a bit out and check.
Add a small dash of sesame oil to give the Chinese flavour.
Cook for 5-10 minutes.
Scoop out your chicken and a ladle full of soup and place in food processor to chop up the chicken. If you don't have a food processor, just dice it up finely.
Pop back into soup and bring back to the boil.
This is the trick!!!
Get your egg whites ready in a cup. Bring the saucepan off the stove and stir to make a whirlpool. While the soup is whirling pour in your egg whites. Place back on the element for a further minute and hey presto that's it!.
As this has egg in it, I like to eat it fresh but if you want to freeze it leave the egg out. For fancy pants's add chopped spring onion on top to serve.


 Thats it from me, its Bold and the Beautiful  and afternoon cuppa time. Be well and happy :D