Sunday, 3 June 2012

Comfort Food

Ahh we have officially de-caterpillared the house and back to the day to day grind. 
So happy to see the sunshine today if only fleeting. I still wasn't keen to risk the clothes line so I hung all the clothes (ok 2 weeks worth of washing-eep) out on the patio. Thank God we have clean undies again..close call!


This cold rainy weather makes me crave the winter comfort foods and i have a confession to make...I am a soup-oholic! In Winter, I could live on my Sunday Soup (with chunks of fresh bread and lashings of butter). Ok so the extras are not great for watching the waist line but this soup is so good for keep immunity up, the budget and is a very healthy, hearty soup.


Sunday Soup


This got its name because I clean out the fridge on Sunday to make way for the new groceries. I use up all the left over veges from the week and add some freshies if needed.


You Need:
One Roast Chicken- I usually buy two and roast them both at the same time. One is for a roast dinner and one for the soup. I strip all the chicken of meat and keep aside for the soup. You can use BBQ chicken but I like it better with Home Cooked.
2-3 Potatoes
1 x can corn kernels or cob of corn chopped up
Stick of  Celery- don't get ripped off buying a huge bunch of celery (unless of course you plan to use it for something else). Most supermarkets sell them buy small stick and it will cost like 15 cents.
1 x brown onion
Pumpkin, mushrooms, sweet potato, broccoli, spinach, carrot- Basically whatever you have in the vege drawer.
4 x chicken stock cubes or equivalent stock
Optional- 1 chilli- deseeded and chopped very finely ( I add a very small one and you don't really notice it in there but its great for moving the works along, if you get my drift! Great for weight loss soup also skip the bread and butter though)


How to make:
Boil water in a big pot about 1/2- 3/4 full
crumble your stock cubes into the pot
Chop all the veges up into chunks
Add veges and give a stir
Leave for about an hour
Add your chopped chicken
Stir and leave sit for a half an hour.


Voila! Soup done and ready to pop into the freezer. I freeze mine in lunch boxes so if im having a busy day, I have a meal ready. Logan loves his soup. Teenager not so much. I like to leave it rustic and chunky but if you like your soup smooth, pop it in the food processor for a minute.
For another variation, add chopped garlic, can of kidney beans and can chopped tomatoes and its Vegetable  Minestrone, add pasta - even heartier. Omit the chicken and its still great. Best news is its cheap as chips to make and great for keeping Winter sniffles at bay.
Someone else is a big soup fan!


Today we made Chinese Chicken and Corn Soup for lunch. Little man ate a huge bowl and then polished off half of mine, all the while exclaiming, mmmmm num num num! So cute.


Chinese Chicken and Corn Soup- SO flippin easy you will wonder why you don't make it more often!


You need:
1-2 can creamed corn
1 small chicken breast diced
2 x chicken stock cubes
Water in a pot
2 x egg whites
Small onion diced small
Sesame oil
Green onion if you want to be fancy


Method:
Boil you water, if you only want a small saucepan full use about 1 1/2 - 2 litres water
Crumble stock cubes in.

Add creamed corn and onion 

While the water is boiling add the chicken to boil, this should only take 5-8 minutes. If you are not sure pull a bit out and check.
Add a small dash of sesame oil to give the Chinese flavour.
Cook for 5-10 minutes.
Scoop out your chicken and a ladle full of soup and place in food processor to chop up the chicken. If you don't have a food processor, just dice it up finely.
Pop back into soup and bring back to the boil.
This is the trick!!!
Get your egg whites ready in a cup. Bring the saucepan off the stove and stir to make a whirlpool. While the soup is whirling pour in your egg whites. Place back on the element for a further minute and hey presto that's it!.
As this has egg in it, I like to eat it fresh but if you want to freeze it leave the egg out. For fancy pants's add chopped spring onion on top to serve.


 Thats it from me, its Bold and the Beautiful  and afternoon cuppa time. Be well and happy :D


Wednesday, 23 May 2012

Party time...Part 2

Here is Part 2 of the Party Time.....


The Clothes
Boys are not much fun to dress. Girls get all the fun with the frills and bows but hey I have to work with what I have!
I found some Very Hungry Caterpillar material panels at Spotlight and waited patiently for the sale period (40% off woo hoo!)
I made a few shirts as practice and then went in for the jumper. I was terrified I was going to stuff it up but I think it turned out great.

I used applique paper to stick the material to the jumper and then sewed zig zag around the edges so it looked a bit cheeky and rustic. Of course, there had to be a number one on there somewhere so i cut out and sewed it to the back of the jumper.

For the caterpillar’s antennae I knitted small, thin tubes,  stuffed with polyfill and sewed it on. I think it looks gorgeous.
With the left over panels, I mounted one Caterpillar for the little mans bedroom wall and also made a snuggly pillow for story time.

The Decorations

Ahh this was the most fun of all! Thank Goodness for Pinterest for all the ideas and for my hoarding ways for the bits and pieces that helped save not only the budget but also my time, as most of the decorations came together in the wee hours of the night.
The flower caterpillar was the star of the show, hung right in the middle of the party area. I’m so happy how it turned out! Here’s the link in case you need directions....
www.marthastewart.com/how-to/tissue-paper-pom-poms-how-to

I also put a few shades of green through the pile so it looked a bit more textured.
Inside the house I decorated the walls with my party hat pictures. The instructions are on my blog from April 28th.

I also wanted to show all the guests how much my little fella has grown and changed so I decided to do a memory board starting from his first week to his first birthday. This was really hard to choose what pictures, I could have picked 10 for each month but I had to be brutal and just pick one. I tried to pick the imperfect photo’s or the ones we had now put on facebook so they were a bit new and different.

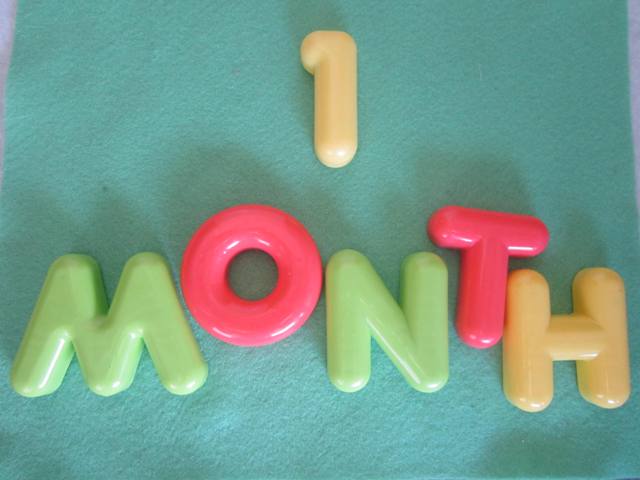
I covered the photo frames with wrapping paper and glued on the photo’s. I also used Logan’s magnetic letters and numbers on a piece of felt to do the labels. I just took a photo of it and printed it off. 


I ended up with two big frames and then did one individual photo for his One Year Old photo. I used the picture from after eating his first piece of birthday cake.

Back outside the tables were of course covered in green tablecloths with one round red covered table (geez pushing the theme here!) To highlight the yummy party food i took a little inspiration mixed with budget thriftyness. My plan was to make these....

But I had no luck finding the right plates and glasses at the opshop so I had to use what I had....platic plates and plastic wine glasses. This looked great but was a bit impractical as once some of the food was eaten the plates got wobbly. Can’t win ‘em all!
I made food labels by scanning in the pages from the book and pasting them onto recycled paper. Then I just sticky taped kebab sticks to the back. In hindsight, i probably should have glued double sides but it still did the job.


Last but not least was the party tent! The kids loved this area so much and I really enjoyed decorating it.

I used my old market pop up tent and hung a mosquito net in the centre. The lace draped over the sides creating a really cool little space. Inside I put the ball pit (made from a baby bath given to me by a friend, Thanks Carissa!) and baskets of water bottle shakers ( rice, beads and pasta in water bottles) and a few soft toys. I laid down my pride and joy- a orange paisley print rug I got from the Salvo’s for $5. Also added Logan’s play cube, bought from an Online Opshop for $30.
Tra laaaaaa Kids Zone was born and I must admit I don’t want to take it down.

The Games
Every kids party has to have Pass the Parcel! Its an old favourite and never goes out of style. I’m a fan of everyone winning something, so I put lolly pops between the sheets of newspaper and wrapped a special prize- a lolly bracelet- for the winner. We also did another classic, Pin the tail on the donkey.
I had also planned to do a Memory game, but most of the kiddies were a bit too little (and running wild) to join in. The game was going to be based on the Hungry Caterpillar. The first person was to name one item the caterpillar eats then the next person has to name two and so on. Great game for older kiddles.
Now this is the point where i went a little crazy...The Felt Story Board.

I decided that i wanted to tell the story of the Very Hungry Caterpillar but just telling it wasn’t enough! I hand sewed the felt version using left over scraps from the fabric box ( see my hoarding DOES come in handy!). The red is from a Santa hat that was sacrificed! The board is just felt taped to a photo frame. This was insane but it looked great and the kids enjoyed the story.  When Logan gets a little older, he will be able to play with this again but right now its going in the Childcare resource box for my studies.
While I was busy with the felt sewing I decided to make a “beanbag” type game to play if the kids got too bored. I made throw the Caterpillar game using the washing basket and it did keep the rascals busy.

This was made by machine sewing the caterpillar and filling with rice and then sewing up the gap. Logan likes carrying it about now!


Last but not least was the Toilet paper game. This was my favourite to watch...hilarious! (But just a warning if you are going to try this game out..buy lots of toilet paper because all the kids wanted a go and I didn't have enough to go around)

Split the kids into two teams and team leaders. The aim of the game is to wrap the leader up as much as possible by winding them up in the toilet paper. Grandma helped out with this one by counting out 10 sec intervals and then the kids had to change over. So so funny to watch the kids run and the leaders wrapped up like mummies!!!

The Cake
Ahh the cake! This was a bit of a struggle for me to be truthful. Cakes are just not my thing but I think I did alright!
First thing was the cake pops. Now these are some very fiddly little suckers but once you get the hang of it, literally its a piece of cake. Organisation is the key here. Here is the link for the how to’s or you can probably follow my directions and then I will do my best to share the tricks.

First step, make your cake. Seriously it doesn’t matter what sort of cake you use. I used no name vanilla cake mix, costs 70 cents from Coles.  Once you have made it, blend it up in the food processor with some icing. For the icing, i stir up about a cup of no name icing mixture with a tablespoon melted butter and about half a teaspoon of boiling water and vanilla essence. You don’t need to add much icing just enough so the mixture comes together like a bit of a dough.
Then roll into balls around 20 cent piece size. Place on a tray with non stick baking paper and stick in your sticks ( I used Kebab sticks and then trimmed down to size later)
Most important step!!! Freeze the balls with the stick in for at least an hour.
While you are waiting prepare for the cake pop making as you have to work fast. Organisation is the key!!! (The Salvation Army collector knocked on my door halfway through my chocolate dipping and I swore like a sailor and then ran and got a handful of money from the change jar and practically threw it at the poor girl hehehe)....  Anyway so get your sticks and  a bowl with your sprinkles or whatever decoration needed ready. I also used a piece of Styrofoam to poke my cake pops into to dry. So get that ready too and clear some room in your fridge to put them when you are done too.
After an hour at least, melt your chocolate in the microwave. I used normal eating chocolate because I don’t like the taste of cooking chocolate or melts. (Now I'm no expert so i don’t know if this is the right way to do this, but hey?) Be careful to stir the chocolate frequently so as you don’t burn it and use a metal spoon (again no idea why but that what i know!). Once the chocolate is runny, it go time.
I used a tablespoon to pour the chocolate over the cake pop and then twirl the pop in the spoon so it is covered. Keep twisting the stick so the chocolate goes on evenly and not too thickly, decorate, then stab your pop into your Styrofoam to drip and dry. Once you’re done, pop the Styrofoam block in to the fridge to set.
Now remember this was my inspiration photo...

So I was planning to make one red cake pop and 5 green ones to make my caterpillar and stick the pops into a slab of cake cut to look like a leaf.
So i made my cake pops and was planning on dyeing white chocolate with food dye.
FAIL! I don’t know what happened to the chocolate but when i added the food dye it seized up into chunks.  Panic Panic Panic mode to i basically jammed the red clumps onto the cake pop until it was covered. It actually looked ok but it threw me off. So for the rest i decided to stick with using plain white chocolate and rolling it in green sprinkles.
I must admit i did cheat when it comes to the base. I bought an un-iced slab cake from the Sara Lee factory outlet and Hubbie cut it in the shape for me and iced it green (He was so cute and excited to be finally allowed to help (Bossy much? Me? Bahahaha)

Ah then came assembling the cake. Another problem! Either the cake in the picture is really thick or its Styrofoam covered in icing because when i went to stand the pops into the cake they toppled over. Nervous breakdown #2 for the evening! (This is like 10pm at night too!) So Hubbie came up with the idea of taking the pops off the stick and here’s the end result!

Amazing right! Hubbie and I stood there looking at it for ages, proud as punch.
The cake is sitting on an old picture frame that I pulled out and covered with wrapping paper and contact paper. I iced the words with icing from a sandwich bag with the corner cut out. Pro’s haha.
So if this wasn’t enough, I also made 30 more cake pops  so no one missed out (and so there wasn’t a fight for who got to eat the caterpillar!) I displayed them in a planter box (from Chickenfeed $2.99) and covered the Styrofoam with crepe paper and cut up wool.
So all up I spent close to $240 all up and it took close to two months of  planning and preparing.
So was it worth it...Hell Yeah! Loved every minute.

In the end it may not be for everyone and by no means is this blog meant for bragging rights. I write this blog to keep track of my ideas, projects and inspirations and mostly to share really cool ideas with whoever wants to listen.
Also, Its kind of an online diary to show my babies how much their Mumma thinks of them.

Night Night from this Mumma. I have a new Tafe subject to tackle, starting tomorrow. First subject is now done with Dictinction average yippeeeee!

Monday, 21 May 2012

Party time!!!


Phew! That was hectic but oh so much fun! I’m proud and a bit relieved to say that the big party went off without a hitch. The kids ran wild and the adults could sit and relax and my little man...well I think he was glad when it was all over! He was very overwhelmed when he woke from a nap to find 50 people in his backyard, all wanting to touch, hug and talk to him all at once.

Birthday parties are so meaningful and special to me. I heard someone say that planning kid's parties were like writing a love letter to them. I love this thought and totally agree. You know what, I went completely over the top, did more than was necessary and loved every minute of it! There was love in every little project, every stitch, every smudge of icing
.
I think the easiest way to show you my tips and tricks is to break up the party in to all the mini projects and try to explain how it all came together, so here goes. I hope this serves as inspiration to another Mumma.
I will also  split this blog into a few posts as I have been writing the draft for the Birthday Cake for over an hour now and I'm still not done lol!

The Theme
This was a no brainer as my little man is an eating machine and LOVES The Very Hungry Caterpillar book.
If you haven’t had a look through this book before...I highly recommend doing it. The pictures are simply stunning in their simplicity and complex in their details. Children love the simple storyline and adults understand the meaning. Its a perfect theme for little ones as they grow to be a butterfly.

The Invitations
My Hubbie is a Photoshop wiz, so I found a invitation on another blog and basically used it as a basis for ours. Hubbie formatted it a little differently and added pictures of our man in the caterpillar face. I would love to go into more detail as to how he did it, but I honestly have no idea!!! Thats his thing and I just let him go to it!! 
For obvious reasons our details are erased!

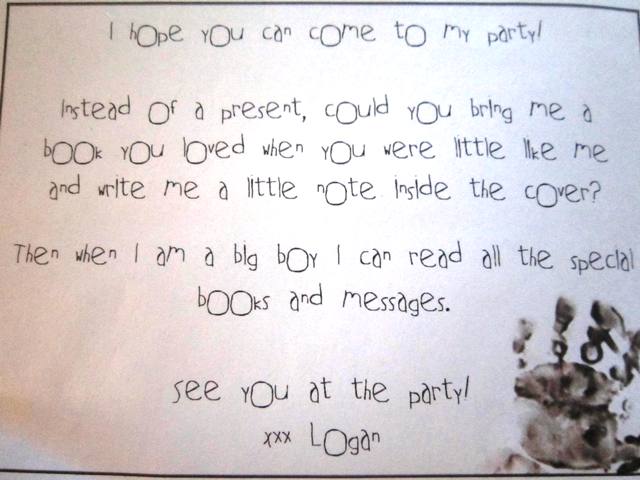
We also decided that we didn’t want a huge influx of Fisher Price hitting our already stuffed toy box in the lounge room. Instead we slipped a little note in with the invitations....


I just loved this idea and so did all the guests. We had the best time trawling through book stores and memories to find the perfect book.
I gave him The Jolly Barnyard. It’s a little Golden book but I remember loving it as a child. It cost all of $2.90 but means a great deal to me. Lulah gave him Mr Mc Gee and Hubbie passed on his well cherished copies of Lord of the Rings and the Hobbit.
Now Logan has a huge library of really special books that he will cherish over the years. So so much better than plastic toys which won't last the year.

The Party Menu
I had to use a little imagination here, due to many factors. 

Money, seasons and practicality.

We decided to have an afternoon tea party at 2pm to cut the cost of having to feed everyone. I think this worked out well but then I was worried people were hungry on the way home. Hehe I can’t help myself!!!

So in the book the caterpillar eats;
One apple, Two Pears, Three Plums, Four Strawberries, Five Oranges, One chocolate cake, One Ice cream cone, One Pickle, One slice of swiss cheese, one slice of salami, One Lollipop, One piece of cherry pie, One sausage, one cupcake and one slice of watermelon and a large green leaf.

So I made...

Cupcakes shaped like apples (didn’t want to serve apple slices as they would brown too quickly). I made these using heart shaped cupcake tray, icing with pink icing, adding a spearmint leaf and half a pretzel stick to decorate.

Swiss cheese triangle sandwiches on a bed of spinach leaves

Cupcakes

 Fruit platter with Pear, Orange and Watermelon


Chipolata Sausages


Mini Cupcakes iced with purple icing for the plums (Plums not in season)
Cherry Pies (found from a tiny local bakery)


Strawberries ( not in season and you don’t even want to know how much these cost!)

Also, cake which was the birthday cake
Ice cream cone were lollies (Coles brand-my favourite)
Salami and Swiss cheese triangle sandwiches served with pickles on toothpicks
Lollipops just were themselves

I also made fairy bread ( a MUST for any kids party!) and individual chocolate pudding cups that looked like dirt.

For these I made up chocolate pudding, poured into plastic cups, added crushed oreo cookies on top and added a gummy sour worm and few sprinkles for decoration.


The Party Favours
I put together two types of party favours- Butterflies and bubbles. The butterflies were decorated by cutting up Logan’s finger painting efforts. It took a bit of time to collect enough though, so if you are planning on making these, cross your fingers and hope your bub loves to fingerpaint  or prepare in advance lol!! I then cut two small marks to poke through a lolly pop and wrote “Thanks for coming to my party” on the back.

The bubbles were very simple. I just bought a big pack of bubbles from Woolies and printed out labels on the computer. To finish off, I stuck the labels on some gorgeous recycled paper  and strung them  on with gift wrapping string.

Ok, That's Part One Finished....Next Blog will have The Cake, The Games, The Decorations and The Clothes.

Time for a quick cuppa and some leftover cake before the Big fella wakes up x x x x


Tuesday, 15 May 2012

OTT

Ok so maybe I have gone a LITTLE overboard....
But you only turn one once right! Yes I came to the OTT conclusion when I completed the hand sewn felt board story of The Very Hungry Caterpillar at 11pm. My poor hubbie looked at me and said, "Next year, no party, right?"
Ha! I've already started pinning the next few years of parties hehehehe
So, as I'm like a kid at Christmas, I could not wait to unfold my paper flower caterpillar. I did describe it quite terribly in the last blog so here is a sneaky peek at the finished product. It's hanging in my room at the moment but I will be the feature above the tables at the party. 
What do ya reckon? I'm a bit pleased with myself : ) 


So with only 2 days til my little man's birthday and 4 more days til the party... I am off now to clean some more and give dinner in the slow cooker a stir. 
I will post after the party with all the decorations and food ideas so as not to ruin too many of the surprises....YIPPPEEEEEEEE!
Ps: Please everyone cross everything it does not rain!


Saturday, 28 April 2012

Busy as the busiest bee but guess what! I think i'm on top of the birthday celebrations. Woohoooooo!


I have been concentrating on the menu and decorations this week and as always have turned to Pinterest for inspiration.
So my lovely Mumma friend Rhona put me on to this one....
This is the Pinterest picture. How gorgeous does it look?
I had THE best time doing this decoration! I was in stitches looking through the photo's and all the different funny faces. I just zoomed in and cropped the pictures. Then printed in greyscale and cut around his cute little face....
 

As my party will be in the backyard (AND IT WILL NOT RAIN!!!). I decided to firm them up a bit by pasting onto thick cardboard. I then cut out the party hats from old wrapping paper and hot glued on some pom poms to decorate.


Voila!!!

And what do ya think? I'm very impressed with the pics, if I do say so myself!

Next on the list this week was the cake. I'm pretty crafty and stuff but baking just eludes me. I can't cook nice cakes. But as funds are super tight and fancy cakes are well and truly out of the budget....i'm going to have to pray for a miracle.
Here is the two I really liked and i have decided to go with the second option...


So i had a trial run on the cake pops and I have to say they are pretty easy (fiddly but easy). I think i'm going to be able to pull this off (this is where you cross your fingers hahaha)

Here's the link for a simple how to make them. Just remember to pop the balls in the fridge for a while before you attempt to dip into the chocolate. Otherwise you get a big splodge of cake in the melted chocolate which you have to dig back out again hehehe.

Hmmm what else....
oh yeah! I printed out a photo from each month of his life to show how he has grown and changed so quickly. This was really hard coz i have zillions of pictures to choose from and i could have picked 20 for each month. I'm still working out how to display them...Work in Progress

I have also put together tissue paper pom poms to make a Very Hungry Caterpillar with. It's a little hard to explain so you will have to use your imagination and of course I will share the pictures from the day.
Here is the Pinterest Image...
 
Ok so imagine green pom poms and a red one for a head all in a line at different heights. Argh.. Trust me it will work!!!!!
Kinda like this idea...But better OBVIOUSLY haha


Phew! Time for this Mumma to jump in the bath and make a nice hot cup of tea. I've had a very cranky teething little caterpillar and a sick darling girl this week and Mumma is DRAINED.

Hope your all well and happy : ) 

Sunday, 15 April 2012

Hungry Caterpillars

I love birthday parties. Especially theme parties. I am THE theme queen!
Next month is my little man's first birthday and of course its going to be an extravagant backyard affair in our chosen theme...The Very Hungry Caterpillar!
My man is OBSESSED with this book! I swear I read it 60 times a day and really is very apt coz man the kid can eat! Some nights, particularly spag bog night he can put away more than his big 12 year old sis.
So the invites are all set to print and I've been chipping away at the finer details (lists, lists, lists). I thought I would share a few special things.


I briefly entertained the idea of getting him a caterpillar suit to wear but realistically I can't even get a hat on the kid 9 times out of 10 so I scrapped it and decided to get my craft on instead and decorate some clothes.
Now sewing...hmmmm...I wish so much I could sew. But I can't. I'm hopeless. But I don't care coz I love it and I don't care if its wonky or the stitches look crap.
I got some fabric panels from Spotlight and some great advice from the lovely old ducks behind the counter and gave applique a go. Here's what I have so far....


 The number 1 is the back of the hoodie and I am going to put a large Caterpillar on the front. I'm just scared I'm gonna stuff it up so I keep procrastinating hahaha.
I also made my little man a special pillar to lay on at story time. It's a present so shhh dont tell him.


Super cute huh!
Ok so here are my inspirations, from Pinterest of course! Check out my board 
http://pinterest.com/krisnlulu/hungry-caterpillar-party/. Now I just have to find the time to pull it all together.
Hmmm wonder if I can????

Thursday, 22 March 2012

Crafternoon.....

I have been so busy lately with the kiddles and my return to study, I have been totally neglecting my crafty urges. So with Easter fast approaching I thought I had better get a wiggle on...
Here's what I have been playing with this week...
Aren't these so adorable! I love my nanny crafts hahaha.
Here's the link if you want to try out. Don't worry they are SUPER easy!
http://own-two-hands.livejournal.com/46859.html


I also found this one at http://familyfun.go.com/crafts/knotty-rabbit-660672/


This reminds me of the Cami Teething toy. You could make this with either a large flannel or one of those microfibre cleaning cloths. 


I have also been obsessively making tissue paper flowers this week. They are everywhere in my house at the moment and I LOVE 'EM!
Here's the link to the tutorial http://www.marthastewart.com/how-to/tissue-paper-pom-poms-how-to#slide_4
and here's what the finished product looks like....


Beautiful!


Much Much Much to do today. These next few months are HECTIC and I am slowly preparing for the big 1st Birthday Party for my little man. So exciting : ) 
We are planning a Very Hungry Caterpillar Party for our little man. I'm so excited to share our plans and with any hope I can pull off a smashing party.


Now get outside and enjoy the sunshine...if only while hanging out the washing ;p